Warning: Undefined variable $show_stats in /home/jdqespth/public_html/wp-content/plugins/stats/stats.php on line 1384

Unusual Black Bean Dips

Wooo! Let me tell you something amazing!

So my sister got me a food processor for a house warming gift. And this is the magic key to making bean dips. I had no idea.

But now there is so much freedom!

Last weekend I had people over to craft, and I made up a platter of sandwich fixings. But I forgot to make something vegan (I mean, there was bread and lettuce and tomato and all, but nothing of bulk to hold it together). I’d meant to buy some hummus – as you do – but I’d forgotten and checked it off my shopping list in error.

And the person came up to me and softly asked, “Erm… food?” Or words to that effect.

And I could just go to my cabinet and pick a random can of beans and turn it into random dip.

Random Dip, I tell you!

First option: Chipotle Black Bean Dip

Step 1 – drain the beans, rinse thoroughly (otherwise it can get too salty), and dump into the processor.

And then I said unto myself – we need a saturated fat alternative to lard, and I have this here awesome coconut fat. So I added about a tablespoon of that. And some olive oil, because why not?

Oh, and you’re closing the food processor and turning it on in between each addition and then tasting to see what else would be good – I don’t think you can over-process bean dip.

And then some fajita seasoning. But the beans are a strong flavor, so also some powdered oregano and thyme and maybe some cinnamon, too, for fun.

Oh, yeah, and there were a few cloves of the roasted garlic I had in the fridge. Raw would have been fun, too.

And, yet, still not spicy – and rather thick.

So I squeezed a lime into it and added about half a teaspoon of chipotle sauce (maybe more?).

And it was amazing. The non-vegans were all over that, too! I enjoyed it on potato bread with microgreens.

So then a few months later, there was a need for dip again… and a guest had started a bottle of red and turned out to be the only one drinking wine that night, so I decided a swig of red wine wouldn’t go amiss, and I shaped the dip around that flavor.

Red Wine and Ginger Black Bean Dip

Drain, rinse, and add the beans to the food processor. And a slug of red wine!

Oh, yeah, coconut fat would be even more appropriate in this combination.

And then peel and grate about an inch of ginger into the bowl of the processor (and then brush it off the middle part because that gets awkward).

Grind some black pepper. Squeeze some lime. sprinkle just a little cinnamon and thyme.

And a teaspoon of dijon mustard rounds it out nicely.

Curried Collard Greens and Rice

Yet another delicious meal made out of scraps and leftovers in my fridge.

It all started with a text message to geeksdoitbetter asking: given that I have leftover rice and leftover raita in my fridge, how many more ingredients do you think I’d need to add before I could call it food?

Her reply was that all I’d need to do would be heat it up and add curry.

On further inspection, I noticed I also had some collard greens in need of attention, so a slightly more respectable meal was born.

Curried Collard Greens

Wash and cut up your greens (I went for roughly one inch square pieces).

Heat a teaspoon or two of oil in a pan. Add a Tablespoon of mustard seeds, and drape the pan with foil or a spatter guard because they goal is to have them pop.

Once the mustard seed start popping, add a teaspoon of cumin seeds and a generous sprinkle of asaphoetida.

After just a minute (or less) of toasting the spices, add the greens to your pan.

Sprinkle with a curry powder of your choice. I was hoping to make a dent in a jar of tandoori seasoning, but that ended up needing more fenugreek and turmeric to smell right.

Go ahead and throw the rice in, too, since this will add some moisture and heat to the leftovers (note: leftover rice can develop nasty food poisoning, so store/eat with care).

And then I added both leftover tamarind chutney (1-2 Tablespoons) and the leftover raita (1/2 pt container) and stirred them in until the collards had an even coating of a fairly dry sauce.

The end result wasn’t necessarily classy, but it was a decent and serviceably dinner. It ended up spicier than I was expecting, even.

Scrounging off my priviledge – carrot curry, spicy cauliflower penne

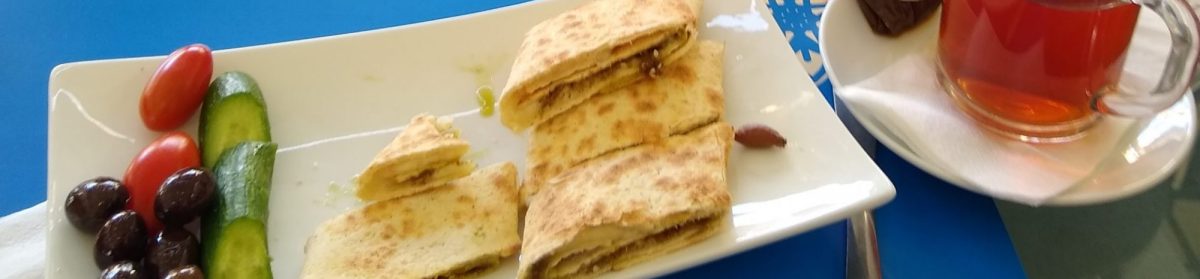
I’ve been trying to be thrifty this week. I had to buy tables so I could invite people over for a Passover seder.

But I lucked out last Friday to find leftover crudite from some workplace event put out in the staff room. And I had empty lunch containers at the right time, too. I acquired cauliflower, broccoli, grape tomatoes, orange bell pepper, mushrooms, baby carrots, and a decorative yellow chile.

Breakfast Mushroom Sautee

So the mushrooms were something I wanted to eat for breakfast. So I made half a slice of bacon, removed it to drain and left the fat in the pan to cook the rest.

I turned the halves of mushrooms into slices and then sliced up the yellow pepper and an onion. They went in onions, then mushrooms, then pepper. As it was cooking, I cut in some fresh rosemary.

And then I just stirred it until the mushrooms released liquid and then browned a bit.

I spooned this over top a fried egg on toast, and it was enough to have covered 2 or 3 eggs, but I still had my spoon and just went ahead and ate it directly without company.

I didn’t know what to do with the cauliflower, until I remembered the remains of the Saint Agur I’d been thinking would melt into a nice pasta sauce. I also had a random jar of hot pepper garlic pasta sauce that my parents hadn’t gotten around to using, so had passed on to me. And I’m just going to take a moment to give this a review on its own. That jar is not pasta sauce. It might be the random oddly-sized scraps of garlic and hot pepper (red, decently thick fleshed), having been left over from making a pretty jar of pickled peppers, that you decided to put into a jar with some oil… but it is not sauce. It’s a bit harsh. I have a very sturdy constitution, and it was threatening me with heartburn. So it’s an ingredient… a way overpriced one… but it’s not what it claims to be. Luckily, I was just using it to perk up the cheesiness – unluckily, I hadn’t realized how much oil I’d be unable to avoid adding on top of the cheese. Should you try this, just cut up some garlic and hot peppers on your own.

Spicy Cauliflower Penne

Start the water boiling and just start the cauliflower cooking when you put in the pasta – this isn’t going to take much more than the 9-10 minutes the pasta cooks. I think this dish is well suited to a whole wheat or spelt pasta.

Cut up an onion, and got that started in a teaspoon of olive oil.

Then I went through the cauliflower and barely broke it down even more – into a fork-friendly size – and added any extra stem bits into the pan right away to give them more time to cook. Then I turned the heat higher than medium and added the cauliflower, looking to get it softer and a bit browned without actually making it limp.

When the vegetables are two minutes from the right consistency, turn down the heat and add the cheese in clumps. Stir them in to melt evenly. And here I added some of the hot pepper garlic ‘sauce’ and stirred that in – about 2 teaspoons or so, draining out as much of the oil as possible. It benefited from some black pepper ground on top, too.

Then I used a slotted spoon to shift the al dente penne to the cauliflower and stir it in so that it was coated with sauce and absorbed that for the last bit of its time and sucked in flavor, too.

And then I ate most of the broccoli dipped into hummus, but I had a few pieces left when I was trying to decide how to use up the rest of the vegetables. While looking in the fridge, I noticed I still had a partial can of red thai curry paste waiting for use. Perfect! It was only after I started cutting that I noticed just hot very orange this dish was going to be – at least there were a few broccoli pieces to add a little contrast. Actually, that shocking bit of contrast looked amazing on the plate.

Carrot Red Thai Curry

Rice: 1/2 cup short grain rice; 1 cup water; pinch of salt; 1/2 tsp coconut cream – boil, reduce heat to low and cover for 20 minutes.

Curry – wait until there’s only 10 minutes (or less, but I have no patience) left on the rice before starting to cook.

6 ounce cans of coconut milk are the best thing for the single cook!

Shake the can until it sloshes (keeps the fat from sticking to the lid and sides) before opening, and then pour it into your pan to heat. Once the oil starts pooling at the top, add about a third of a pound of baby carrots, sliced in half.

Cook for a few minute before adding the curry paste – 2-3 teaspoons, stirring in and tasting between each addition.

Add the broccoli.

And then add a(n orange) bell pepper, cut into 1 x 4 cm strips).

Stir to coat and cook evenly. When the bell peppers just start to look no longer raw, take them off the heat and you’re ready to plate.

This made two portions.

I’d put the second portion in my freezer and gone out to the porch to eat, when one of my new neighbors came by and asked if I’d made enough for two since she was very hungry. I’d expected her to end up disappointed either because of the lack of protein or the spiciness level, but she came back full of compliments with my container empty.

Homemade ricotta experiments

I came back from Italy with a new appreciation for ricotta — it was soft and pudding-like for breakfast with a hint of sweet; it was in rich discus cakes filled with ricotta and chunks of chocolate; it was served in a simple dish of freshly made fettuccine, ricotta, and black pepper, which was one of my favorite meals of the trip.

And I’d always read that ricotta was one of the easiest cheeses to make – no rennet required.

The very next farmers’ market, I set out to get some of the best milk possible. The farmers selling pasteurized milk were out, so I purchased a half gallon of local raw cow’s milk.

Then I read up on various instructions.

Especially useful was this comparison of various acids and draining times.

I settled on heating 4 cups of milk to 180F (on the high end of the 165-185F range, but reading a blog on food poisoning has made me nervous about raw milk) with 3 teaspoons of distilled white vinegar and a pinch each of salt and sugar.

Now here’s the interesting part – I made this recipe almost exactly the same twice and had very different results.

Ricotta

First Iteration
I mixed together the 4 cups of milk and 2 teaspoons of vinegar, slowly raised the temperature (electric range with dial on 4 of 12).

By 160F, I had pebble-sized curds, but it didn’t separate further. I waited until 180F, when an enzyme might or might not be an broken down, and then added the last teaspoon.

(salt and sugar added around the 165F point, when I was fiddling and eager for something to happen)

Beautiful separate occurred, and I drained promptly.

Results were just like ricotta cheese available in containers in stores and not the magical stuff of Italy. All in all a success, but worth playing with more.

Second Iteration
(made two days later, if age of the milk might be a factor)

This time, I heated the milk first without mixing in other ingredients. Same rate of heating.

Salt and sugar still went in around 165F.

All of the vinegar, however, was slowly poured at 180F. Again, all three teaspoons were needed before separation occurred.

Resulting texture, however, was much more in the squeaky cheese curd family. This is not ricotta, and I have no idea what’s different.

I turned down the heat as soon as it hit 180F, so it shouldn’t have spent significantly more time at temperature, and it didn’t go higher.

I’m baffled.

Both had the same yield: roughly half a pint.

OTOH, I am so making lasagne later this week and trying the ricotta for a middle layer and the second batch instead of mozzerella (or in addition to).

Chickpeas with Browned Butter and Thai Basil

Even though it’s still a time of bountiful farmers’ markets, I’ve been shopping shopping from my pantry in an effort to save money.

Now I’ve always claimed that I could hold of a siege army for 2 months with careful use of my pantry, but even I am impressed with my food budget for this month:

personal food: $146.26
social food: $210.13

I’m defining personal food as groceries and dining out alone and personal food as dining with other people and groceries bought explicitly for food I share with other people.

That’s just extraordinary. We’ll see how well that holds out.

So, I cobbled together something delicious today – a co-worker had brought in massive quantities of thai basil from her garden and all the rest was from my pantry.

Chickpeas with browned butter and thai basil

So I’ve never made a browned butter sauce before, so I looked in my fridge and decided that the ghee was going to waste and was just like butter. So I scooped out some of that, melted it on medium heat, and waited for it to brown. Which it didn’t because the whole reason it’s clarified is so it’ll have a higher cooking temperature.

Right, so I tipped some of it out (I didn’t measure the ghee going in or coming out – it had been slightly more than the minimum to complete cover the bottom of a twelve inch skillet) and replaced that with 3 Tablespoons of butter. It started browning almost immediately and was a lovely sauce base in a minute or so.

I sprinkled in some asafoetida to fry, and then I also sprinkled in some galangal.

To this tasty brown butter I added 1 yellow onion, sliced radially to a medium thickness.

Once the onions had fried enough to be soft, I added chickpeas (drained from a can). I stirred them about and let them cook for about 5 minutes while I stripped the leaves from the basil plant, stacked them, and then sliced roughly through the stack about 4 times. I also grated the zest of one lemon with the leaves.

Once I figured the chickpeas were as soft and cooked as I wanted them, poured in 1 teaspoon of fish sauce (I happened to be using Phu Quoc fish sauce) to give it some saltiness. Just a few stirs, and then I tossed in the leaves and zest.

I’d been planning to also squeeze the lemon’s juice into the dish, but the zest made it lemony enough. So once the leaves had become bright and wilted, I splashed in about an eighth of a cup of apple cider vinegar. I let it cook just until it quit smelling so strongly of vinegar, and then I dished it up.